

Choosing a Telescope: Advice for Anyone Seeking to Buy
Copyright 1994, Revised Dec. 2010, All Rights Reserved
Who Are We? Company Seven's team is extraordinary well qualified to assist you. Ours is a public service oriented company, we bring decades of experience working with amateur and professional astronomers to bear when helping others to prosper in our hobby. We provide an uncommonly fascinating showroom open since 1982. Our customers satisfaction rate, measured by our incredibly low return rate, is uncommonly high in any industry; we may go through years without a single customer returning their telescope. And when a problem or service issue arises, our response is matched only by few of the most conscientious manufacturers in our industry. Our goal is to avoid your feeling like: ![]()
Among the reasons why our customers are so successful is that they are better informed and advised before they buy, then supported well after delivery. In an effort to help you we have written this overview to help you avoid mistakes and to buy more wisely. We hope you will read this article carefully, making notes as you proceed, then refer to other applicable sections in our Internet site. After this homework assignment you will be better able to help us to help you attain a great outcome.
First Point: You Do Not Need A Telescope To Get Started: You should not feel any overarching sense of urgency to get into our hobby; astronomy has been around for millennia and it will still be there when you are ready to jump in. In fact, it is a simple matter to begin exploring the night sky the next clear night–just step outside and look up with your naked eyes. You will do a bit better to get started by using aids, some are simple as the Planisphere or a basic Start Chart illuminated by a dim red flashlight to conserve your night vision.
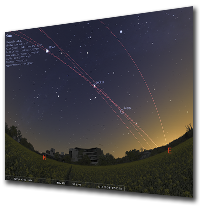 If you own a portable computer then we encourage you to download free planetarium software that will help guide you through the sky, and to identify what is up and when. The popular application Stellarium is among the best and easiest to use astronomy software efforts, with versions made for Windows PC, for Apple Macintosh OSX, Apple iPhone, Linux, and for other platforms too. This is a beautifully done and highly capable free open source planetarium for your computer. It shows a realistic sky in 3D, just like what you see with the naked eye, binoculars or a telescope. The Stellarium application includes a selectable day or night vision (dark red screen) mode, so you could be out tonight holding your iPhone overhead and seeing the sky mapped for you as you move your smart phone pointing from one are of the night sky north or south and east or west! This makes getting familiar with the night sky, even with the naked eye a snap!
Right: one of the screens from Stellarium. This perspective shows the night sky from a backyard point of view; there are many other choices of how and from what point of view the application will project.
In fact certain celestial wonders, most notably meteor showers, are observed best by the naked eye. Meteors appear only briefly and are dispersed across wide areas of the sky. Some comets have spanned such a wide area of sky that not even a binocular might show their entire width. Company Seven has helped build several astronomy clubs in our region. These offer beginners opportunities to observe at comparatively favorable locations, in safety, and you may look through various telescopes and binoculars there to help you judge which might be the best suited for you.
Binoculars for Astronomy? 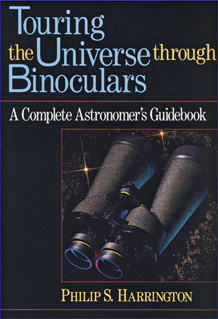 You should weigh the merits of starting off into the hobby with a binocular, especially if you already own one. If you already own a binocular of reasonable quality, then it can reveal a number of celestial objects much better than observing by the naked eye alone. A good binocular can help you to learn your way around the constellations while glimpsing several of the brighter large objects including: the Andromeda Galaxy, large emission nebulae including M42 the “Great Nebula” in Orion, and the occasional comet. If you have no space to store a telescope, or if you travel frequently then a binocular might be more practical for those adventures than taking a telescope. Furthermore, some binoculars may be suitable for other applications too including: birding, travel, shows or sports, spying on your neighbors, etc. So it might be a worthwhile and versatile investment for you. If you choose to start of with a binocular then you should have a suitable guide book to help you find and understand what you will see; among the titles we recommend is Touring The Universe Through Binoculars, a softcover book by Philip S. Harrington.
There are some downsides to relying solely on a binocular. For one, you may spend as much or more money to buy a good binocular than you might spend on a more versatile first telescope.
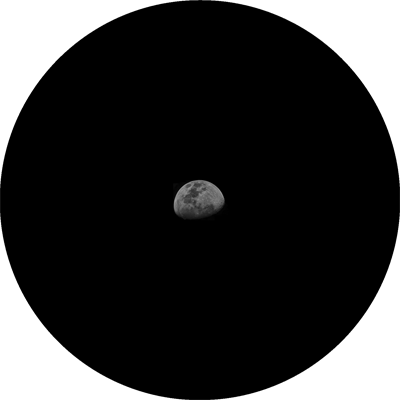
Secondly, consider that a typical 7x 50mm hand held binocular shows a field of view of up to about 7–½ degrees wide. While the Moon (as impressive as it may be) is about ½ degree wide, and so it appears as an object that is only about 1/15th the width of the field of view:
|
|
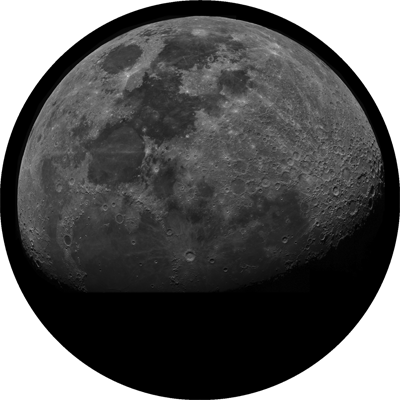
 And with most hand held binoculars forget about doing much more than identifying a few planets by their color, or seeing an elongated disc that you may recognize is Saturn. But with a telescope one can attain clear distinct views of the Moon and its terminator, changing major features of the planets, and most telescopes we will recommend you start off with will have the added light gathering power to see fainter objects more distinctly.
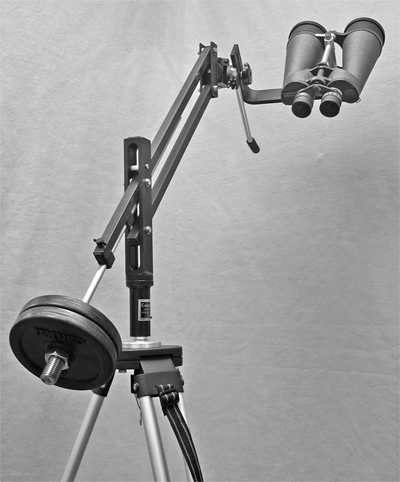
Of course, we do sell wonderful larger binoculars that can show more impressive views of the Moon and other deep sky objects. But these larger binoculars are unwieldy for hand held use over extended sessions, and so they are often mated to a parallelogram mount with tripod. Our point is that if you are going to drag a tripod outdoors, then why not take a telescope if you can manage to transport it to where you plan to observe? Besides that, almost any well made larger binocular with a stand will cost as much or more than a reasonably well made first telescope–and the binocular will not best the telescope for versatility.
Right: one of our the most acclaimed mid size binoculars for astronomy is the Fujinon 16x 70 mm FMT–SX (98,506 bytes). The binocular is shown here supported by an optional Universal Astronomics UniMount™ Light Deluxe parallelogram mount and field tripod. The cost of this complete set is a bargain at about $1,400.
Our point here is that it has been our experience that more newcomers will progress further and for longer into the hobby if they are to buy either tool, with a telescope. In time you may add a hand–held or larger binocular to complement the telescope. The first telescope should be a tool that will impress the viewer providing memorable views of those magnificent celestial objects including the planets and the Moon. The better telescopes can give you access to worlds beyond our solar system where there await galaxies, star clusters, double stars, nebulae and more!
Today there has never before been such a wide selection of telescopes on the market, neither have there been so many that are suitable for the novice and that sell for a comparatively modest cost.
Special Considerations When Buying For Children: a telescope can be a great gift for a young child when that child has demonstrated some sustained interest in astronomy or related subjects. But consider that very young children (ages 4 to 6 or so) go through phases that can pass in a matter of weeks, days, or hours and you should so balance the desire and expense carefully. Be mindful that when buying a telescope for a youngster the chances of real success will be improved if someone can provide the child with basic instruction about how to use the telescope, and with some initial guidance on how to find one's way around the night sky.
Considerations After You Buy: for reasons including permitted access to observing sites, for security in numbers at night, and to obtain help in learning the hobby we urge you to participate in astronomy club events, especially their star watch activities which are usually open to members and the public for free. And to learn more about what can be seen in the night sky, and how to observe you may refer to many on line sources including our own observing planning aids page, or you can perform a search by entering your state and "astronomy club" in an Internet search engine.
It has never been a better time to enter the hobby of astronomy since so many good telescopes are made today, many that simply did not exist decades ago, but that are comparatively affordable. Unfortunately, a high percentage of telescopes sold today are not very good for astronomy; they are put together in great numbers and then marketed by people who understand little about telescopes or the hobby. These retailers think foremost of putting something in their store shelves that will attract impulse buyers and they are largely successful in making sales and recouping a high percentage profit. However, many of the 'department store' telescopes that are sold end up in a closet or in the trash. The frustrations shared by many beginners in the hobby who buy these tend to originate with:
Not only will the loss of interest in the instrument result in the loss of money, but it is far worse when any fascination that one might have ever had about this hobby is destroyed.
![]() 1. Introduction: Telescopes Are Tools they come in many sizes, shapes, and differ in how well they are made. Each telescope, even the famous NASA Hubble Space Telescope, will do somethings very well and other things not so well. So we think of telescopes as tools, each with one or more useful purpose:
1. Introduction: Telescopes Are Tools they come in many sizes, shapes, and differ in how well they are made. Each telescope, even the famous NASA Hubble Space Telescope, will do somethings very well and other things not so well. So we think of telescopes as tools, each with one or more useful purpose:
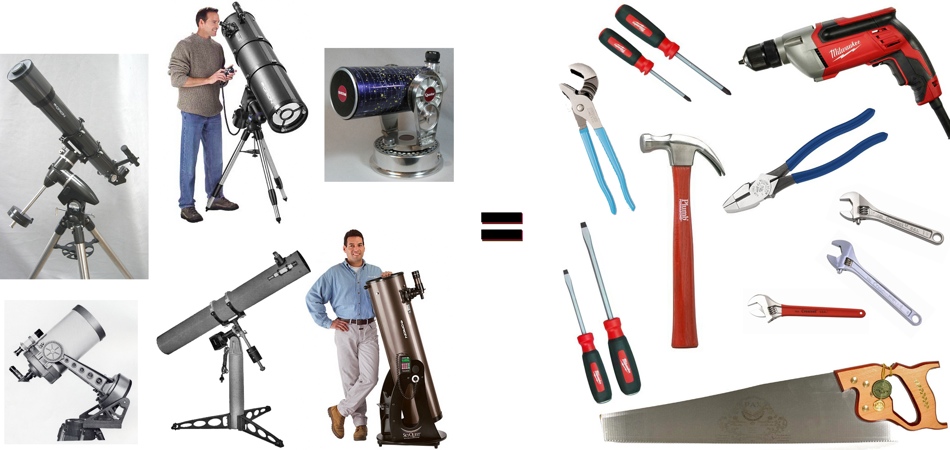
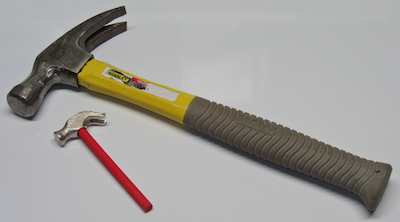 There is no such thing as a beginner's telescope anymore than there are beginner's hammers. Our first contact with most newcomers who call or visit our showroom often starts out with them introducing themselves with something like “I want to buy a beginner telescope” or “I want to buy a telescope for $XXX, what do you have?” While most of us who work for Company Seven probably started into the hobby years ago asking similar questions, we now relate that approach akin to greeting the staff in a hardware store with “Hi, I want to buy a tool today and I have $50 to spend, what do you recommend?” There is no such thing as a beginner's telescope anymore than there is a beginner's hammer or a beginner's screwdriver; there are cheap tools and then there are tools that work well and last longer than others. The approach of shopping by price or by what some might market as a beginner telescope reveals nothing about what the user might hope to accomplish with their new telescope, and it may arbitrarily limit what you are offered by most salesmen elsewhere. The approach that is much more likely to produce a good result requires one to start thinking of telescopes as a tool, with each model having specific strengths and weakness. Beyond that also understand there is no one telescope that can do it all for you in either astronomy or for nature watching, even the Hubble Space Telescope has it's strengths and weaknesses. And so just as when picking a tool, when your task requires a $100 table saw then you should buy (or rent) that table saw.
Understanding what the tool is expected to do: When most people visit a hardware store they do tend to understand which tool they need. When they contact a telescope store, then the matter of choosing a telescope is complicated by the fact that few of those who are new to the hobby have an understanding of what they may expect to do with the various available telescopes. For example, when we ask visitors to our shop what they wish to see they often reply “I want to see stars”. Well, one can see stars with the naked eye. And a star viewed through a telescope still looks like a pinpoint of light (in some telescopes or on turbulent nights a star may appear more like a “blob”). And so we at Company Seven first work to encourage and inform the novice by explaining what they may realistically expect to observe with a telescope. We do this by discussion in our showroom, by offering well thought out introductory books, and by providing opportunities to attend observing sessions with astronomy clubs.
![]() 2. The “Test Telescope” We understand why many people reason “I just want to buy a first, inexpensive telescope to see if we are interested in the hobby̵. That approach might work with many other purchases, but for buying telescopes that rationale is rarely successful because the telescopes sold at the lower prices are quite limited in what they can show, and so the novelty of most modestly priced telescopes usually wears off soon as the user will almost always quickly tire of going out only to observe an object with no detail, or changing features. Just imagine going out night after night only to see Saturn appear as a BB within a washer; how many nights will you want to go out only to see the same thing?
2. The “Test Telescope” We understand why many people reason “I just want to buy a first, inexpensive telescope to see if we are interested in the hobby̵. That approach might work with many other purchases, but for buying telescopes that rationale is rarely successful because the telescopes sold at the lower prices are quite limited in what they can show, and so the novelty of most modestly priced telescopes usually wears off soon as the user will almost always quickly tire of going out only to observe an object with no detail, or changing features. Just imagine going out night after night only to see Saturn appear as a BB within a washer; how many nights will you want to go out only to see the same thing?
Which would you rather see through your telescope – the Saturn at left, or Saturn looking like a BB in the Washer at right?
The worst aspect of failure is when a poor choice of telescope destroys any budding interest there may have otherwise been in the hobby of astronomy. But just for argument's sake, let us assume that first telescope inspires someone to want to see more. If one does remain at all interested in the hobby then that modest first telescope is likely to be outgrown soon, and that customer will be back soon for a better telescope – and the $100 or more invested in the first telescope will likewise have been wasted. And since the accessories provided with the common department store telescope are usually not upwardly compatible (if at all desirable) for use with a better quality telescope, there will be nothing to salvage from the first telescope to help growth into another more advanced model.
We suggest you save your money (skip a few nights out to dinner, etc.) to buy something better, a telescope that will give you better reasons to go out out night after night. And while you are saving your funds there are ways to explore the hobby and determine whether or not the interest may take hold. After all there should be no rush to buy a telescope since the sky is not changing all that fast.
God Did Not Make All Telescopes Equal: Telescopes do vary in design, aperture, physical dimension (length, width, and weight). And they differ how well they are made, even from one another of the same model they can vary. And while two telescopes may appear to be identical in their advertising claims and by their appearance, one telescope may provide a great experience while the other becomes a source of frustration. Unlike other commodities such as cars where there are standards (every car has headlights, tail lights, can do 55 mph, etc.) or in foods where guidelines define what claims may be made, there is no regulatory authority governing the advertising of telescopes.
The basic philosophical aspects of choosing the telescope will be:
A good telescope brings with it improvements over the naked eye in two aspects:
Resolving Power: reveal fine detail on a distant object, or those smaller than the eye alone can perceive.
If one were to hold a thin sheet of plain or wax paper just beyond the telescope focuser, then move it in or away from the telescope until the image is most clear they would observe the image formed at the Focal Plane. Furthermore, as light is bent and shaped on its way through the telescope the image will be reversed; this can be seen in the illustration below where the image formed is upside down and reversed left to right.
Terrestrial (or “spotting”) telescopes differ from astronomical telescopes primarily in the facts that spotting telescopes are generally more compact and rugged for extreme ease of transport in the field, and spotting telescopes incorporate an image erecting prism to present an image that appears right side up and correct left to right. While the image from most astronomical telescopes may appear upside down, and or inverted left to right. This is not a great concern because astronomers care more about the quality of an image than it's orientation. And after all, how many people would even know they were looking at Jupiter upside down? The eyepiece is at a convenient position on most Newtonian telescopes, but it is at the rear of the tube of Refracting and Catadioptric telescopes. So to provide more comfortable observing through Refracting and Catadioptric telescopes these are usually furnished with a 90 degree angled mirror or prism accessory (Diagonal or Zenith Prism) installed between the focuser of a telescope and an eyepiece. The Diagonal diverts the cone of light coming out of the of the telescope to a more comfortable viewing position, this is especially helpful if you are looking at an object overhead in the sky with these telescopes. A good quality Diagonal may account for some barely perceptible light loss, but the convenience provided by it will be well worth it. The Diagonal accessory is not compatible with most Newtonian telescopes since the Newtonian lacks the back focus distance needed to pass the light through the extra distance taken up by the Diagonal and reach the eyepiece.
The image from a Refracting telescope with a Mirror or Prism Diagonal installed will appear right side up, but backwards left to right. Examine the following illustration to see how the accessories affect the perspective.
Top Left: Normal view. Top Right: Erect and Reversed – typical in an astronomical refracting or Catadioptric telescope with Diagonal,
Accessories do affect the quality of the image coming from a telescope. For example, a poor quality Diagonal will introduce problems which may make the image appear blurred or not as sharp as it could have been, or even cause a loss of brightness. Astronomers do not mind seeing an image that is reversed as they seek to limit or delete any component that can adversely impact the image, so much so that it is common to find a Sky Atlas or Moon chart printed to match their orientation as observed through the various telescopes. For viewing at relatively lower magnifications or for observing terrestrial objects then an image erecting prism may be employed with very little noticeable degrading of the image.
Right: Astro-Physics 92mmf7 "Stowaway" Apochromat Telescope with retracting Lens Shade extended, Lens Cover removed. Telescope is shown on optional TeleVue "Telepod" Alt–Azimuth Head, with optional Astro–Physics 2 inch Maxbright Mirror Diagonal and TeleVue 35mm Panoptic eyepiece attached (209,055 bytes).
The astronomical telescope is a system consisting of two main components, plus some accessories that tailor the instrument to the goals of the user:
A) the Optical Tube Assembly (OTA) – includes the optics of the telescope, mechanisms that precisely hold the optics in place, and a focuser which supports an eyepiece or camera. It is the OTA which will determine what and how well you will be able to see or photograph, and how bulky the system will be. The OTA design and quality of manufacture also determine how maintenance free, or durable the telescope will be.
The telescope optical tube is characterized by it's 1) Design (see below), 2) Aperture the diameter of the primary mirror or objective refractive lens (expressed in millimeters or inches), and 3) effective Focal Length – essentially a measure of how much magnification the basic telescope optical system produces; this too is expressed in millimeters or inches. Another term that you may come across is Focal Ratio.
So when you read the description of a telescope “60mm x 700mm” this indicates an aperture of 60mm (2.4 inches) and Focal Length of 700mm. The Focal Ratio of aperture to Focal Length would be 700 divided by 60 or f/11.7. This is not a true measure of relative brightness since this formula does not consider the efficiency of the system which may include effects of: central obstruction, quality of optical figure, reflectance of mirrors, throughput of refractive elements. A 4 inch f10 aperture refractor can provide a notably brighter image than a 4 inch aperture f10 obstructed reflecting or Catadioptric telescope...more on these later.
B) the Mount: includes either a Tripod or Pier, and a Head. These are the components which will determine how one can employ that telescope OTA, how complicated or simple the system will be to operate, the degree of convenience or ability to share the telescope with others, and how bulky or heavy and quick to set up the overall system will be.
A poor mount supporting a superb OTA produces a poor telescope. One good test of a telescope mount is to tap on the telescope optical tube lightly then observe if the telescope jitters for more than a brief moment. This is not to say that astronomers strike the telescope while observing, but imagine how a slight breeze or the touch of a hand reaching to focus that telescope will cause the image in the eyepiece to blur at 100X or more when even a slight tap causes the telescope to vibrate for several seconds!
Common photographic camera heads and tripods can be fine for a DSLR camera with 50mm or up to a 600mm lens, but these are typically inadequate for supporting astronomical telescopes. First, most photo tripod and head sets are not rigid enough to support payloads operating at magnifications as high as telescopes do. The image observed in an under–mounted telescope will appear to blur, shake, rattle and roll with even the slightest touch of a guiding hand or from the pressure of a stiff breeze.
Secondly, photo heads are not engineered to be guided smoothly as the balance of the payload changes. If you adjust the head clutch so that the motions up and down in particular are smooth and easy, then as the attached telescope is pointed higher and higher to the sky the center of gravity shifts back toward the observer's side of the mount head. The weight and leverage of the telescope will cause the heat platform to slip, gradually sliding back. If you tighten the head clutch lock to support the telescope more stiffly then there is enough drag so that one can not move the telescopes smoothly however, any move to just slightly center a planet in the field of view is likely to result in a jerk that shifts the object right out of the field of view.
Third, few camera tripod heads permit the pointing of a long telescope to view areas directly overhead without the rear of the telescope becoming restricted by the tripod journal where the three legs meet.
Even those Fluid Heads which can move more smoothly will tend to sag minutely when set onto a target high up or overhead. This may not a problem at low magnifications with a camera lens, but is pronounced at higher magnifications.
Right: Click image if you wish to see an animated movie of the Earth Rotating.
For an observer located in the Northern Hemisphere objects rise in the Eastern horizon, gradually moving in an arc up and right across the sky towards the South, and then continue moving to the right and down towards the Western horizon. This motion can be observed with the naked eye if one carefully observes the limb of the Moon as it rises or sets behind trees or some other fixed object in the distance, the motion though slow is perceptible. A telescope provides magnifications far beyond that of the human eye, as the magnification of a telescope in increased (25X to 50X, 50x to 100X, etc.) then this motion of an object drifting across the sky will appear accelerated. With a very well designed Alt–Azimuth mount it is possible for an observer to track objects by manually guiding the telescope at magnifications of 200X or more, and some people are comfortable at magnifications in excess or 300X.
The solution to the limits imposed by the manually guided Alt–Azimuth mount is the Equatorial Mount. There are a number of designs of Equatorial mount but those which the amateur is most likely to encounter are the Equatorial Fork and the less intuitive German Equatorial arrangement. Computer Controlled Fork Alt Azimuth mounts are coming available too where the mount moves simultaneously in two axes to stay on target. Either mount head is attached to a suitable field Tripod (usually made of wood or aluminum), or onto a portable or installed Pier usually made of aluminum or steel.
The Equatorial Mount permits one to turn a telescope in the opposite direction from that which the Earth is rotating, at the same apparent speed as the Celestial objects are moving. This permits tracking of celestial objects by moving the telescope clockwise in an arc sweeping in one smooth movement from East to West across the sky in the “Right Ascension” (R.A.) direction.
To track precisely, the rotating Right Ascension Axis of the mount is adjusted up or down and left or right by the user so that this axis of the mount is parallel to the rotational axis of the Earth. Depending on the telescope, an equatorial mount will provide acceptable results for visual uses even if the mount is aligned to only within about a couple of degrees of the Celestial Pole. But as you align the Mount more and more accurately, then the need to periodically make minor adjustments to center a target in the eyepiece becomes less frequent. A very accurate alignment of the mount to the Celestial Pole is especially beneficial for those who intend to attempt long exposure astrophotography.
Equatorial mounts may be equipped with hand driven gear controls for fine adjustment of the Right Ascension axis, and usually also for the other Declination axis too. The controls of some German Equatorial Mounts are provided with long dangling flexible cables to make it possible to control the telescope while at the eyepiece. The motion is so slow that few people can observe the motion, this rotation is only on the order of one revolution per 24 hours!
Many mounts include or will accept the option of a motor to permit automatic rotation of the telescope mount RA axis. The drive is often referred to as a “Clock Drive” since the earliest mechanical telescope drives were clock mechanisms that had been modified to rotate only once every 24 hours. When properly set up the motorized Equatorial Mount (do not panic, the staff at Company Seven will teach you how to do it) allows you to walk away from the telescope and return later to find the telescope still on the target.
For those “down under” in the Southern Hemisphere, the motion turns the telescope in the opposite direction and so most of the better motorized telescopes have a switch to permit the operator to select a clockwise or counter clockwise motion.
The type, and quality of the mount and its drive system will determine what if any distractions from observing there may be, how convenient the telescope will be to share with others and especially young children, and can facilitate pursuing astrophotography.
Right: Meade Instruments Model 2080, 8” f10 Schmidt–Cassegrain Telescope with Equatorial Fork Mount, 1980 (74,655 bytes)
The Fork Mount is a very easy to understand and by being the most intuitive type of telescope mount to use they have become ubiquitous. Fork Mounts can be the quickest Equatorial platform to set up since as few as two components (telescope in the Fork, and a Field Tripod with or without Wedge) may be all that comprise the basic telescope. There are fewer parts to carry than the German Mount typically requires, and far less counterweights; typically only a comparatively lightweight set attached to the optical tube to balance it in Declination. The downside is that the fork is typically not made to release the optical tube and so one must carry the entire assembly. So the largest of these telescopes that can be managed by the average adult is the Celestron 11” (28cm) or the Meade 12” LX200GPS (30cm) as the weight either of these larger telescopes can exceed 70 lbs. (32kg) for OTA and fork.
The Fork Mount usually includes a clock drive installed within the Base to drive the Right Ascension axis. Earlier mounts made through the 1980s incorporate manual over ride fine geared controls for Declination and Right Ascension. More recent computer controlled telescopes may include no manual controls relying instead on the electronics to operate all functions of the mount. The Fork Mount is a good choice for those who need quick response to reach any quadrant of the sky for activities such as gamma ray burst or satellite tracking studies, etc. this is because the Fork Mount can track continuously from one horizon to the other and as such has an advantage over the German Mount that must perform the “meridian flip”. Consumer computer controlled telescopes fork or German mounts typically can slew at up to 3 degrees per second, while the fastest slewing mounts in professional astronomy are fork systems capable of moving at up to more than 20 degrees per second!
For observatory installations the pier for the equatorial fork mounted telescope is usually not installed at the center of the observatory floor, but instead is offset to accommodate the tilt and keep the telescope tube centered over the middle of the observatory; the pier it fairly dedicated to a fork and makes it less able to accommodate a German Mount if that becomes desired later.
The best known Fork Mount telescopes are the Questar 3–½" Maksutov–Cassegrain, the Ferrari of ultra compact, user friendly telescopes introduced in 1954 and still in production. But the most popular are the versatile and relatively compact Schmidt–Cassegrain telescopes (SCT) pioneered by Celestron in 1970, and since 1980 also made by Meade Instruments. The most popular consumer models (that make sense in astronomy) are the 8” (20cm), but consumer grade Fork Mount SCT's are made as large as the Meade 16 inch observatory telescope. Of course we offer much larger professional observatory class fork mount telescopes such as our own 24 inch at the MCCMO Astronomical Observatory.
Easy to Use? The German Mount is not the most intuitive arrangement to the novice. But with a little practice the system is easy to use: the the telescope is slipped into place with counterweights added and balancing done in both axes, with the mount Pole axis Aligned. The German Mount has two perpendicular axes called the Right Ascension (RA, or Polar) and Declination (Dec) axes. When the RA axis is aligned parallel with the Earth's rotational axis, objects can be easily tracked as they drift across the sky (due to Earth's rotation) by turning just one axis (RA) instead of two, as is required with an alt azimuth mount. You point the telescope onto an object by simply nudging the tube up or down, and left or right by hand. Once centered onto an object, the Clock Drive can keep the telescope moving along on the object as they move across the sky. A dual axis drive provides the added capability to make fine adjustments in the Declination axis too.
When mated to a suitable telescope, the German Equatorial Mount provides:
The German mount arrangement has advantages over the fork mounted designs in that:
The telescope will swing from one side of the mount to another (“meridian flip”) as it is directed to explore the four quadrants of the hemisphere. At times this flip may be inconvenient and so this has to be planned for when attempting long–term tracking (astrophotography, etc.). When using a German Mount with a Newtonian telescope this may put the eyepiece at an uncomfortable position however, most Newtonian telescopes we offer can be furnished with Rotating Mounting Rings so the optical tube Focuser and Eyepiece may rotate to more convenient positions.
Left: Celestron International NexStar 11 GPS, 11” f10 Schmidt–Cassegrain Telescope with Computer Controlled Alt–Az (or Equatorial) Fork Mount, (85,089 bytes)
Computer control telescope mount systems require the careful integration of at least two basic sub systems: 1. a dual axis drive
or telescope positioning system to move the telescope to a specified position, and 2. dual axis position feed back systems to
keep the positioning system informed of where the telescope is pointing to.
No Pole Alignment is necessary to operate these telescopes, and set up may be as simple as turning on a power switch since the latest generation of GPS telescopes can determine their location, and with very little assistance from the operator the telescope may become operational. These Fork Mounts dispense with the weight and cost of the Equatorial Wedge, unless one wishes to become involved in time exposure astrophotography. But there are certainly some caveats when buying a consumer grade computer controlled telescope.
The Meade and Celestron computer controlled telescopes have approximately the following features: altazimuth operation, incredible 10 degrees per second or faster fast slewing speed, a selection of built–in tracking rates which may include: sidereal, King, lunar and solar, fully enclosed optical encoders for feedback of position location, standard 12 volt DC systems which can operate from batteries at a site almost anywhere in the world.
However, in part by the manner in which some of these telescopes are marketed some people have come to believe that these telescopes do everything for you, completely automatically, this is not true. Most of the consumer consumer oriented computer–driven still require the operate to have at least some knowledge of the night when setting up the telescope. When the telescope mount is properly set up, it can move the telescope from one object to another across the sky. If there are any errors in the system due to even a slight inaccuracy of initial set up, or slop in the optical system or optical tube mounting hardware, then the pointing errors can accumulate reducing the pointing accuracy to a point that the observing session may have to pause as the operate reindexes the mount precisely onto a known star or other reference point in the sky.
Also keep in mind the telescope's computer is not a substitute for observing experience. The telescope can not tell you when a night is clear and steady enough to see an object in its database clearly. And the telescope electronics can not tell you which accessory to use or not on any particular target of the observing session.
There are many factors to consider when starting the process of choosing a telescope. One should be considering these thoughts:
b. How will the telescope fit into the users lifestyle?
Since no one telescope is truly perfect, one that is capable of doing everything exceptionally well, each telescope is a compromise of sorts. During the process of choosing a telescope based on performance the importance of the three variables to the buyer are balanced, one against the other. Observe how the meeting points originate at the corners and meet somewhere in between reflect potential compromises.
This is not to say that one can not find all three good qualities in one telescope. For an example of how this may work consider:
The user may determine that telescope #1 is the best choice in terms of performance and portability reasons. Or, if the cost of telescope #1 is too high, then possibly the buyer may be able to find another telescope with some compromise of Quality or Design to a degree that it becomes a reasonable acquisition.
One could extend the number of variables if so desired, possibly factoring in usefulness for astrophotography. A spreadsheet could be written, with a column for each aspect that is considered important, and each with a value assigned – possibly using a 1 to 10 scale. After values and priorities are assigned, the values could be totaled up; this can help one to reach more objective understanding of the possible choices. Some spreadsheets can graph the data revealing something like a matrix illustrated above. A similar approach could be employed to help with the selection of a suitable mount. One can complicate the process of selection, or simplify it to many degrees in fact, we have encountered some persons who seemed to prefer doing the research for the purchase as much or more than the actual use of the telescope!
The consumer is likely to run into only a few basic telescope optical arrangements:
The refracting telescope objective lens is usually made up of two or three lenses joined in one group placed at the front of the telescope, these gather and bend the light so that it comes to focus at a point just behind the telescope focuser. The focusers often have draw tubes long enough to accommodate a good selection of photographic and visual accessories. The ratio of aperture to focal length of a refractor is typically between 5 to 9, or may be or as long as 15.
There are many ways to make a refracting telescope; some poor and cheap, others superb and costly. Good refractors remain the preferred choice of visual astronomers who seek the most natural, contrasting and clear images of the brighter objects (Moon, planets, stars, Sun etc).
What is an “Apo”? Short for apochromatic, this term describes a design that brings the three primary visible colors (red, green, blue) to focus at or very close to the same plane. Colors of the spectrum have differing wavelengths, to see this consider how in a normal optical glass prism the red and blue rays are bent (refracted) at slightly different angles as they pass through. In camera Normal and Wide–angle lenses this is imperceptible, or it can be corrected with other techniques. But telescopic refracting lenses magnify the variation in focus between red and blue light rays. In a telescope, this dispersion results in color fringing often manifested as a violet halo surrounding objects that contrast one against the other, and an overall reduction of sharpness. One way to reduce the false color is to increase the focal ratio so that light traveling through less glass may suffer less dispersion – hence the relatively long f15 ratios typical of refractors up to the late 1970's. But even f15 refractors (which can become unwieldy, and require more costly mounts) will show some false color at higher magnifications. In another approach, camera lens making companies (most notably Carl Zeiss, Nikon, and Canon) pioneered the Extra–Low Dispersion glasses, and Fluorite crystal technologies to solve this problem. These materials provide reduced chromatic aberration in portions of the spectrum from the D (yellow), through C (red), F ( blue) and G (violet) Fraunhofer lines. The transmitted wavelength from 0.125 to 10 microns may br twice that of common Crown glasses. And so compared to Achromatic designs, Apos can provide a brighter, more clear image particularly at higher magnifications. Reflecting telescopes (discussed below) reflect light uniformly across the visible spectrum – and so these are by their nature "apochromatic" designs.
With glass technology advancing, if is now practical to make Apos of f5 to f6 focal ratios; these apochromatic refractors are most sought after due to their highly perfected image quality, relative portability (usually the best view per pound of telescope), and photo–visual versatility. The fastest Apos offer low magnification wide field of view capabilities necessary to observe the larger nebulae, or perform wide angle astrophotography, and yet they retain the high magnification clarity to reveal and photograph the changing features of the major planets. The faster refracting telescopes also may provide awesome panoramic views of the countryside or seashore. However, some people still prefer the f8 to f9 Apos, particularly for observing planets, and possibly saving some money since it is easier and somewhat less costly to make a first rate Apo perform well at f9 or so, than at faster f ratios.
Some refracting telescopes employ atypical optical arrangements, these include the beautiful brass 4 inch aperture TeleVue “Renaissance” and the more conventional "101" telescopes. Al Nagler's patented four element design is based on the Petzval concept where a two element air spaced objective lens at the front of the telescope passes the light through to a second doublet lens positioned at the rear of the telescope and before the focuser. The doublet lens group at the rear functions to 1) reduce the effective focal length, and 2) reduce or eliminate curvature of field so that images are sharp and clear from the center to the edge of the field of view. This is a way to make the telescope suitable for low magnification, wide angle work as well as providing crystal clear high magnification operations (views of planets, etc.).
Because of the proximity of the rear elements to the focal plane of the Petzval refractors, the focuser draw tubes are relatively shorter than those on common refractors. And so some of these telescopes may not be able to accommodate as good a selection of photographic and visual accessories unless an optional Negative/Amplifying (Barlow) lens is employed. A number of the better Apo refractors can accept optional thread in “Focal Reducer/Field Flattener” lenses similar to that included in telescopes such as the TeleVue telescope illustrated above; these lenses typically have an effective reduction of focal length (and focal ratio) by a factor between 0.25X and 0.33X.
Where they work well: refractors are well suited for use anywhere, at urban or dark sky locations. Models with apertures of up to 5 inch it is a simple matter to move the telescope with mount outside to a convenient location, and pound per pound these better models provide the best views. Commonly provided with either right angle prism or mirror diagonal, the view is right side up but reversed left to right; this is fine for astronomy and many terrestrial applications. The more compact (faster f ratio) varieties with magnifications that can go to as low as about 10X or less are the most highly recommended telescopes for terrestrial use with some being accessorized with an image erecting prim in order to correct the image left to right as well.
Assembly, Maintenance: refractors are essentially maintenance free systems with tube assemblies that are factory assembled, fairly impervious to the elements, and will not go out of collimation unless there is some catastrophic impact damage. This does not mean that those which are commonly marketed for $500 or less are made well, nor does is it to say they are even properly aligned when coming out of the box – the gist is that either they will work or they should be exchanged.
Other Thoughts: Many of the better made small refractors are considered by merchandisers to be priced out of the marketplace, and so very few good quality 80mm (or smaller) refractors remain in production today. The better larger refractors are among the most costly telescopes (inch per inch). More common than not, what can be found in department stores and mail order houses are cheaply made in terms of mechanics and shoddy in optics; sometimes identical in external appearance to the good telescopes which they mimic. Current cheap refractors are made in China and other low labor cost nations, while the better small telescopes are manufactured in Japan or Taiwan. As the quality of smaller telescopes has become shoddy, the reverse is true of the selection of better refractors.
The finest refracting telescopes are now made in the U.S.A. by 1) Roland Christen's Astro–Physics company, a manufacturer of the world class triplet apochromatic refractors (with such unprecedented demand that waiting lists for deliveries averages years!) and by 2) Al Nagler's TeleVue Optics, pioneers of the ultra versatile 3 and 4 inch Achromatic and Apochromatic refractors. And from Japan there are "Takahashi" and "Vixen" who were the among first to make affordable high performance Apos available to the serious amateur, bucking the f15 Achromat trend by introducing much faster f ratio lines of 3 inch and up to 6 inch Calcium Fluorite Crown Doublet (and later the Takahashi FCT Triplet) Apochromat telescopes in the early 1980's. One good sign is the TeleVue Optics who opened a subsidiary Vixen North America to import the more costly Japanese made Vixen brand of Achromat and highly regarded 102 Fluorite 4 inch Apochromatic refractors; Company Seven is pleased to see (and offer) these and some other telescopes back on the market.
The Focal (or f ratio of Aperture (mirror diameter) to Focal Length is typically somewhere between 1 to 4, or 1 to 8. The most popular consumer reflecting telescopes include traditional “Newtonian” (first made by Sir Isaac Newton) and the simpler and less costly Dobson style variation; the focuser of these telescopes is at the side of the telescope near the front. Other more costly reflecting designs include the Classical Cassegrain, where the primary mirror has a perforation in the middle thereby permitting light from the secondary mirror to reflect through the primary mirror and into a focuser at the rear of the telescope. The typical Newtonian telescope will be mated to a suitable German Equatorial mount. Those systems used by amateurs are commonly between 6” and 10” aperture since the larger telescopes are so bulky, and require heavy mounts that cost and poor portability constrain their popularity.
Reflectors may make up with quantity what they lack in efficiency however, these are particularly desirable instruments when a great deal of light gathering power is needed. Experienced astronomers generally suggest that at least a 6 inch aperture telescope of good quality (in suburban skies 8 inch aperture or larger) with focal ratios of between f6 to f8 be considered for uses astronomy if you are to have any hope of observing recognizable deep sky objects (assuming the local skies are dark) and the changing features on the major planets. Consider that an 8 inch reflector at f6 is physically just as lengthy as a 6 inch f8 telescope. And yet the 8 inch model (of similar design) will have a 56% increase in light gathering power over the 6 inch model, yet the difference in price between the two sizes may be only 20 or 25%.
The Equatorial Newtonian reached its peak popularity in the 1970's, this was before more transportable and economical alternative Dobson style (or “Dobsonian”) arrangement became available. The Dobson is a variant of the Newtonian reflector characterized by the use of a simple Alt–Azimuth mounting, lightweight thin Primary mirror, and modestly priced components. This evolved from a goal of San Francisco sidewalk astronomer John Dobson during the 1970's. He wanted to get the most telescope possible into the hands of the local amateur astronomer, for the lowest relative cost. As the popularity of this arrangement increased, so did the variation of design and features. The Dobsonian telescope consists of the optical tube assembly riding on a simple wooden alt–azimuth trunnion. The "Dob" base is commonly made of particle board, or laminated hardwood with Teflon bearings; smoothness of balanced movement up/down, left/right are critical to success with these telescopes. The optical tubes are typically made of weatherproofed cardboard (Sonotube), plastic, or rolled metal, and may be have a length of from 40 up to 80 or so inches (100 to 200cm) with an outside diameter between 8 to 20 inches.
The single tube telescopes of 10 inch aperture or greater can be prohibitively bulky and heavy, even more so for children. The better Dobsons of 12–½ inch and larger tend to be made in a truss frame design to facilitate disassembly into a more manageable and compact package. The top and bottom assemblies of the telescope are made of wood or composites, held precisely in place by lightweight support tubes. A healthy adult can manage about a 20" (or larger) truss telescope, however with current technology it is the weight of the glass or ceramic mirror that remains the limiting concern.
These more sophisticated Dobsons may incorporate composites for light weight, fans to acclimate the primary mirror faster, heaters (to keep dew from forming), even computer controlled tracking systems! A healthy adult can manage about an 18 to 20 inch (or larger) truss telescope since with current technology the bulk and weight of the glass or ceramic mirror remains the limiting concerns. Never before has the enthusiastic amateur community contributed so much, so rapidly to the evolution of a telescope design.
The most popular size reflectors for newcomers to the hobby had been the 6 inch f8 and 8 inch f6 models. However, in recent years several 10 inch f/4.9 models have become very popular at Company Seven, here recognized as “the sweet spot” balance of performance and portability. Since each telescope has a focal length of about 48 inches then the physical length of these telescopes are similar. The price difference between common beginner 6 and 8 inch Dobsonian is only about $100 while there is a 50% or more increase in light gathering power favoring the 8 inch over the 6. So we suggest beginners consider the 8 inch f6 at a minimum if they seek a good, economical, telescope and are comfortable with the other characteristics of these telescopes. Those interested in observing deep sky objects should aim for the 10 inch models.
The best overall Dobson telescopes with apertures up to 10 inch that we offer include those made with a straight rolled metal tube wall offered by Orion. The best larger Dobson telescopes include the truss tube telescopes made by Obsession, Star Master, and by Astro–Systems, though in recent years the Orion 'g' series tracking and go to telescopes have earned much acclaim. If you attend any major "Star Party" or "Starwatch" event such as those organized by astronomy clubs then you will see large (up to 30 inch or larger!) well made Dobson telescopes providing breath taking views of galaxies, nebulae and more.
Where they work well: these are particularly well suited for use at dark sky locations, away from the city. The larger telescopes are a good choice where it is a simple matter to move the telescope outside to a convenient location. Being open tube telescopes, these are not recommended for use at sites near salt air since the corrosive dew will deteriorate the exposed mirror coatings.
Other Thoughts: Reflecting telescopes are best suited for applications in astronomy. These are impractical for terrestrial uses due to the awkward position of the focuser, their reversed and inverted image, and the relatively long distance from target required to focus. These telescopes even as small as 6 or 8 inches in aperture may be too lengthy to fit into some very small cars, and these or larger telescopes may be more bulky than many adults or children wish to manage. Focal ratios of between f5 to f6 provide good versatility, as they grow to f7 and longer these become awkward for many and limit the field of view more and more although at f7 or more their contrast can improve to provide refractor like views of the planets, and moon. We recommend no Newtonian to adults or teens smaller than 6 inches for astronomy unless the Moon and Sun (with safe solar filter) are the only objects of interest.
Right:
Let's use the example of taking an image of the Moon with an Orion SkyQuest™ XT–8 telescope with a Prime Focus Camera Adapter. In this configuration we would be shooting as a 8 aperture 1,200 mm lens at f/6. The Moon is about the only celestial object where most people will be impressed with the image, it could be accomplished economically with this telescope and a Camera since the Moon is very bright. But as the Earth rotates, the objects in space appear to move across the field of view of the telescope eyepiece or camera. As we increase the magnification even to the point of filling the camera frame with the Moon (typically about 100x) then the apparent motion of the Moon moving across the sky will be speeded up by the same magnification factor. Furthermore, as magnification increases the effective focal ratio of the telescope correspondingly increases to about f/40 or so dimming the image so the shutter speed may be slowed to allow a proper exposure Ð and this increases the likelihood that the Moon image will be blurred. The blur may not be a concern to you in a small print but if you take two images one on a tracking mount and the other without, then blow the images up side by side you will see the differences.
Furthermore, if you were to buy an Eyepiece Projection Adapter to use the 8mm eyepiece to take images of planets for example, then you would be shooting at some 4,000mm focal length and at a focal ration of about an even slower f/70. Besides that consider the challenges faced when trying to photograph a planet at much higher magnifications and higher focal ratios. Or even more difficult, try to image a faint Nebula or a galaxy. So we are not saying that in time one can not pursue this work with an XT–8, but it will need to be moved onto a suitable tracking German Equatorial Mount to be successful in astrophotography such as shown at right.
Assembly, Maintenance: there may be as many as 28 adjustments to be made in order to properly install and to center the optics of a reflecting telescope – we counted as we check newly arrived telescopes at Company Seven! Most of the mirror (or Catadioptric) telescopes sold will have optics that are not properly aligned when delivered; it may prove to be quite a challenge for those who are not familiar with the procedure to assemble and collimate such telescopes properly. Due to inconsistencies of quality control at mass production factories some poorly made telescopes simply can not be properly aligned without substantial modification. Company Seven will adjust this as is needed during our routine quality control checkout procedures however, if we have to ship the telescope from our shop to a customer then we (and the documentation) do provide guidance on how to assemble and align the optics (collimate) of the telescope. Once assembled and collimated then a well made telescope should not go out of collimation on its own, but careful transport should be considered. We often observe amateurs at Star Parties spending quite a while tinkering with their mirror telescopes, hoping to improve the collimation.
Finally, consider these mirrors are exposed to the elements. We do not suggest regular exposure of mirror telescopes to salt air by the seashore unless one accepts the probability that the mirror(s) coatings will have to be stripped and recoated every few years or more.
With light being bent so radically over relatively short distances, in order to perform well these often employ sophisticated aspheric optical elements. The Schmidt Corrector is a thin aspheric lens developed by Bernhard Schmidt in the 1920's for use in the astrographic "Schmidt Cameras" made by the Carl Zeiss company in Germany. This type of lens is employed on the Schmidt–Cassegrain telescope.
Right: The famous Questar Maksutov–Cassegrain telescope, showing the Standard 3.5 model.
The relatively thick, steeply curved meniscas Corrector Lens was the brainchild of two men, working independently and separated by a War. In 1941 A. Bouwers of Amsterdam, Holland and Dimitry Maksutov in Moscow, Russia each were trying to develop an alternative to the more difficult to fabricate thin Schmidt–Corrector. Both men arrived at about the same conclusion but since by 1944 Maksutov had published the design, history associates the lens with his name. The Meniscas Corrector and Cassegrain configuration would become known as the Maksutov–Cassegrain. The Meniscas corrector lens reduces spherical aberration and incorporates the convex Secondary Mirror as an aluminized spot on the inner surface of the Corrector. The Secondary Mirror imparts magnifications of about 5X. When properly made, these provide views very similar in detail and clarity to the finest similar aperture apochromatic refractors, yet about 1/3 or less the physical length of the typical refracting telescope. Having f ratios of f/13 or longer the Maksutov–Cassegrain lacks the versatility of the Apo refractor since the field of view and photographic possibilities are comparatively limited.
The Maksutov–Cassegrain was first popularized in the early 1950's in Lawrence Braymer's Questar 3–½, and later their 7 inch telescopes. Questars have been marketed with very few changes since 1950 as the world's best quality compact telescope, and these certainly are the first and most user friendly telescope. Shown to the left in Polar Aligned astronomical configuration on it's furnished tabletop tripod, and to the right stored in its 16 inch (40cm) tall carrying case with standard accessories.
Another Catadioptric that most mid to advanced level amateurs will come across is the versatile Schmidt–Cassegrain telescope (SCT). While this design predates the Maksutov, it was only in the 1960's that production techniques were developed by Celestron International to make these telescopes more affordable and available to the consumer. The SCT design has light passing though a relatively thin window at the front of the telescope; this may appear to be a flat window but is in fact a difficult to make aspheric lens. After passing through the window the light is gathered at the spherical Primary Mirror (usually about f2) and reflected forward to the convex Secondary Mirror (providing about a 5X amplification), and then back through the perforated Primary Mirror to beyond the rear of the telescope.
The Maksutov and SCT focus arrangement usually provides an internal mechanism which move the Primary Mirror back and forth so that the physical length of the optical tube does not change. The back focus of most Cassegrain Catadioptric telescopes is usually long enough to accommodate a good selection of photographic and visual accessories.
There was surprisingly little further development of the catadioptric design until the early 1990's when the Maksutov Corrector Lens was employed in a configuration that would become known as the Maksutov–Newtonian.
Right: Orion Argonaut™ 6" (15cm) Maksutov–Newtonian telescope with optional Vixen GP–DX German Equatorial Mount (69,941 Bytes)
The first popular Mak–Newt was marketed by Cerrovolo Optical of Ottawa, Canada. Peter Cerrovolo's HD145 telescope was a carefully crafted 5.71 inch Maksutov–Newtonian, the success of this telescope became assured as the materials, consistency of production and performance were very good. The relatively high cost of this telescope compared to similar aperture commercial telescopes did not hinder its marketability – when word became known of it among the astronomy community long waiting lists soon developed. But no one telescope can do it all; the back focus of most Maksutov–Newtonian Catadioptric telescopes is inadequate to accommodate photographic film cameras, and some visual accessories without employing an optional Barlow Lens to reach focus – albeit at higher effective focal lengths and magnifications.
The compact optical tube of most Cassegrain telescopes belie their relatively high f10 to f15 effective focal ratios. Commonly the actual length to diameter ratio of these telescopes is only about 1 to 3 or so; consider for example a 6 inch aperture f6 "Mak–Newt" will have an overall tube length of about 36 inches.So the Maksutov–Newtonian telescopes will have a physical length and diameter similar to the traditional Newtonian telescope.
The Catadioptric telescopes can be lightweight or compact enough to be suitable for use on the very easy to comprehend Fork Mounts as illustrated with the Ultima 8 model at left, or they may be installed onto a suitable German Equatorial mount as shown below at the right.
Where and who they work well for: relatively compact and lightweight, these are a good choice for suburbanites who wish to observe planets or brighter deep sky objects from the city, those who want to quickly pack them up and take them out to the country, or anyone who is looking for simple to manage aperture – particularly in the mid size telescopes. Consider that a 8"f6 Newtonian tube will weigh about 32 lbs (14 kg), be 10 x 48 inches wide and long necessitating a heavy German Equatorial Mount for a total weight of about 100 lbs (45 kg). So the 10 lb. (4.5 kg) 8 inch Schmidt becomes more appealing to many particularly since even when installed onto a suitable Fork Mount with clock drive, lightweight wedge and tripod the complete weight may be only 40 lbs or less! We have customers with 8 year old children easily managing a C–8, while 14 year old children are using the larger Celestron C–11!
The smaller models (Questar 3–½, and Celestron C–5, etc.) are quite popular among those who seek a compact and versatile telescope since these can also be used for nature watching or as an ultra telephoto lens. Although it is not uncommon to see C–8's brought to Kennedy Space Center to observer spacecraft launches, or to wildlife areas to observe or photograph wild life at great distances.
Assembly, Maintenance: being closed systems these are nearly maintenance free. It is no more difficult to clean the durably coated front (Corrector) lens than the lens of any camera lens. The tube assemblies are factory assembled and are fairly impervious to the elements (dew, cold, etc.). The expensive Questar (Maksutov–Cassegrain) telescopes are quite rugged and resistant to abuse; some models are completely impervious to the elements (storms, dust storms, cold), and ruggedized models have been flown into space! The Maksutov–Cassegrain telescopes will not go out of collimation (assuming they were assembled properly in the first place) unless there is some catastrophic impact damage. The more sensitive Schmidt–Cassegrain requires some common sense care; more than half which arrive at Company Seven have been jostled out of proper alignment. Company Seven will adjust this as is needed during our normal checkout procedure. However, if we have to send a telescope to a customer the documentation and we do provide guidance on how to collimate the telescope.
Other Thoughts: the very best Catadioptric telescopes are made in the U.S.A. by: 1) the Questar Corporation who specialize in superb, industrial quality telescopes, and by 2) "Celestron International" who pioneered the mass production of the ubiquitous Schmidt–Cassegrain telescope. There are some new consumer scopes coming from overseas including the very well regarded Maksutov–Newtonians developed by "Cerrovolo" of Canada, others from Japan, and from the former Warsaw Pacts nations where firms that formerly made optics for the military now struggle to survive – and their quality and consistency seems to be improving.
Each of these telescopes may be regarded as very good values, but the Schmidt–Cassegrain is arguably the best value if one is trying to balance versatility and performance. A Celestron 8 inch (and larger models) will do a little bit of almost everything in astronomy fairly well. With a suitable mount, then the 8 inch and larger telescopes are the most cost effective telescopes to introduce a novice to film astrophotography or CCD (electronic) imaging. The value of the Schmidt–Cassegrain to the community has improved over the years due in good measure to the fierce competition by two of the giants in the consumer telescope industry – Celestron and Meade Instruments Corp. Their innovations and need to compete in many areas of technology have resulted in dramatic improvements since Celestron introduced the landmark “Celestron C–8” telescope in 1970. One should note that the original Celestron C–8 telescope (with equatorial wedge and field tripod) of 1970 sold then for about $1,000 (one is on display in our showroom/museum) while a four door family vehicle sold for $4,00 or less. A much improved version of the C–8 telescope with features that were not even imagined in 1970 sells 30 years later for $2000!
The Eyepiece (or Ocular) is an accessory needed for visual use with the telescope, but it may also be used in some photography techniques. Essentially the eyepiece is a magnifying lens used to enlarge the image produced by a telescope. Eyepieces vary in focal length that with the telescope determines the magnification, how wide a field of view they show, their quality of sharpness and sophistication, comfort (eye relief), and in barrel diameter typically being either 0.965 inch, 1–¼ inch, or 2 inch. Economical eyepieces may be made up of as few as three elements in a plastic cylinder, while the more sophisticated designs may have four or up to eight elements of precisely ground glass elements in a metal cylinder.
The better eyepiece will have printed or engraved on its barrel 1. Manufacturer, 2. Focal Length, and 3. Design. By knowing the telescope and the last two variables of the eyepiece we can calculate the basic properties of how that eyepiece will perform on a telescope.
The eyepiece is placed onto the telescope focuser and is then adjusted in order to bring the image to focus. One must not underestimate the importance of the eyepiece; serious amateurs will commonly spend anywhere from almost $100 to $500 (or more) for an eyepiece because they have learned the value of these accessories. Eyepieces can be a good investment, indeed the cost of a selection of eyepieces may equal or surpass the cost of the telescope. It is desirable to plan the purchases carefully so that the eyepieces (and other accessories) remain upwardly compatible should your interests cause you to buy other telescopes. Our lead technician Bruce once suggested that one could weigh an eyepiece then guess it's cost; a good eyepiece can sell for several times the cost of a modest telescope.
The Eyepiece is a vital component in determining several variables:
There are two terms which may seem similar but in fact are not. The Apparent Field of View is the angular area one thinks is seen when looking through the eyepiece. This is the angle subtended from the one edge of the field to the other. With reasonable eyepieces this will be somewhere between 40 and 80 degrees or so. Generally wider is better (assuming the field remains sharp and clear) since this provides a more natural wide angle view as opposed to having the appearance of looking through a narrow drinking straw. Apparent Field of View factors in only eyepiece design and does not consider the magnification effect from the telescope.
Older eyepiece designs such as the Plossl, Erfle, and Orthoscopic are generally acceptable for use on most telescopes of f/7 or longer. However, quality of excellence in design and manufacture do not necessarily determine compatibility. Consider for example the well–regarded Carl Zeiss “Abbe Orthoscopic”, these do not work all that well on telescopes with focal ratios less than about f/7. Most faster telescopes exhibit some degree of curvature, so if you object to less than perfect images particularly at the edge of the field, or if you require long eye relief (distance from lens to the eye) to accommodate spectacles then we recommend eyepieces of advanced designs such as those pioneered by Al Nagler. The TeleVue designs include the pioneering “Nagler” series, the “Radian” (later replaced by the improved “Delos”, and “Delite” series), “Panoptic”, and innovative “Ethos” design. These oculars will provide the widest clear, and flat field images bringing out the most in many telescopes. Wider field of views are particularly desirable for telescopes that lack a tracking mount since as the Earth rotates and objects drift across the field of view, a wide angle ocular shows an object in the field of view for some time longer before having to adjust the telescope.
Do not underestimate the importance of the good eyepiece. Plan to spend between $80 to $400 (or more) for each and realize the cost of a selection can equal or surpass the cost of the telescope. It is advisable to plan these purchases carefully so that the eyepieces and other accessories that you buy today may be upwardly compatible if you buy other telescopes in the future.
Specialty shops tend to have experience with a broader selection of telescopes and the better third party accessories including those made by well regarded specialists. At a service oriented specialty shop you are more likely to see the product, talk to someone who knows the telescope, and obtain quality control assurance and training. A mail order often depends on quality control being left up to the factory since to reduce overhead costs of maintaining inventory, more and more products are drop shipped directly from the factory to the customer. Assembly and any trouble shooting will be left up to the customer. This is not much of a concern if you are familiar with setting up and evaluating a telescope, and if you choose a product line with a reputation for impeccable quality control and customer service – but few manufacturers are impeccable. So more than ever before, the inexperienced shopper may have to do some research to determine not only what they wish to buy but also the competence, and character of that organization which he or she is dealing with.
Telescopes are most often sold by persons who mean well but may have never used an astronomical telescope. Customers and the sales people are often misled by sales literature that has been written by those who have no understanding of the telescope which they are contracted to market. Some marketing terms that affect what and how stores choose to sell include:
Price point: poor telescopes targeting the amateur astronomy market exist because store and factory management are convinced that the impulsive buyer is most concerned about price. The marketing “experts” understand that a percentage of people will impulsively spend $120 for what appears to be a good telescope, and fewer buyers will spend $250, and so on. So telescopes marketed to the novice have been gradually cheapened in terms of optics, mechanics, mount rigidity, and accessory quality in order to keep them within certain prices. Note how few stores stock telescopes that cost much more than $500 – this is the threshold where customers pause to think more carefully, and consult specialty shops that are poised to advise and support the customer. But this approach is in part why many who specialize in that practice (Tasco, etc.) have gone out of business over the recent years.
Most telescopes sold in retail stores are poor to modest quality instruments. Incorporating mediocre reflective (4.5 inch / 114mm diameter or less) or refractive optics (2.4 inch/60mm or less) these are too small in aperture and therefore inadequate in terms of light gathering power to reveal the faint, extended deep sky objects (generally considered to include galaxies, nebulae, etc.) outside our solar system, or faint comets as well if any better than a good binocular. These telescopes lack the resolving power necessary to show changing features of the planets. The Moon or Sun is about all they can manage to reveal, and then not that clearly. There is something to be said for spending $250 to show a child the Moon, Sun, and glimpse of a couple of planets. But for less money you could spend time with him, possibly out with an astronomy club using their better telescopes, or build your own telescope!
Qualifying the customer: the first question a salesperson may think to ask a customer is “how much do you have to spend?” Some salesmen describe this as qualifying the customer, while others simply understand no other way to help. Asking only about budget is not really in the customer's long term best interest; can you imagine a salesperson at the hardware store first asking “what do you wish to spend on a tool” before considering what type of tool you may need? Shopping by price is a poor approach by either the customer, or sales staff. Then of course there is the matter to be considered of some sales people who experience a nearly sexual thrill at "closing" a sale – no matter if the customers' best interest is served well.
And so we suggest that if you are greeted with "what do you want to spend" or "I have a $119 telescope, a $239 telescope and a $359 telescope, which do you want" then you should consider such sales approaches to be among your "walk away" parameters.
Right: Comet Halley on 8 March 1986. Film image taken by Dr. William Liller on Easter Island using equipment from Company Seven was made for the
It is generally accepted by the astronomy community that at least a 150mm (6 inch) aperture decent quality reflector system (with good transparent skies) is needed to show recognizable views of the popular "Messier Catalog" of deep sky wonders. This catalog lists about 100 objects which appear in the sky over the course of a year, some can be seen naked eye. With few exceptions, Company Seven does not consider less than a 6–inch aperture mirror of decent quality, or a good 3–inch (80mm) Achromatic refractor useful for teenagers or adults in astronomy. The makers of amateur telescopes used to state this clearly in their literature as recently as the 1980's when these were the smallest systems they sold.
The typical reflecting astronomical telescope in the retail environment today has an aperture of about 114mm (or 4.5 inch) or less. Up to about the mid 1980's such telescopes were not even available as anything other than finder telescopes; Meade Instruments and others used to make a really nice 4.5 inch Newtonian telescopes for use as a finder/photo guide telescope on larger telescopes! A number of manufacturers that formerly had good credibility among amateur astronomers have to one degree or another sold out or rationalized, making excuses to offer such mediocrity under their names too: the dollar is a tempting mistress. The marketing can be quite deceptive in several areas:
Implied Promises: There are measures taken by some manufacturers that we consider deceptive; the packing box is likely to have stunning artwork or photographs of Galaxies, or a Nebula (probably taken by the Hubble Space Telescope): implied promises of what you are not ever going to see with what is inside.
Misrepresentation of Effective Aperture: examine a selection of common department store astronomical refracting telescopes. Many of these incorporate a mediocre quality objective lens that may be advertised to have a certain diameter – commonly 2.4" (60mm). However, just inside the barrel and behind the lens may be an Aperture Stop (not to be confused with anti–reflection Baffle). The washer like device effectively stops down the lens opening to a fraction of what is advertised. The result is a view that may appear sharper that it would otherwise but the brightness of the image may be 1/5 or less than what it should be. And the detail observed with such a lens could be something like 1/3 of what should be seen in a true 60mm aperture telescope. If the washer is removed, then all sorts of defects (aberrations) related to the poor quality of the lens would become even more obvious to the user.
Magnification Claims: too many companies make unrealistic claims of magnification – as if it were even that important in astronomy.
When I was in elementary school I became interested in buying an 80mm refracting telescope. I compared two competing models. One catalog described a telescope of 450X magnification, the other claimed 454X at about the same price. Naturally, I assumed the 454X telescope was better. It is technically possible to operate a telescope at uselessly high magnifications but this is synonymous to having a small pocket camera film negative enlarged to produce a wall size print – it can technically speaking be done however, there will not be much to see clearly. With a little experience, one will learn that anyone that claims much more than 50X to 60X per inch of aperture for common consumer grade telescopes is either an optimist or a defense attorney! Where in the heck are the Federal Trade Commission, and class action attorneys when you really need them?
Not long ago we noticed a cheap 60mm refracting telescope distributed by Celestron and marketed by a science store chain. The packing box marking which indicated the maximum suggested magnification was pasted over with a sticker claiming something to the effect that this was a "special edition telescope" made exclusively for that chain. The claim was far higher magnification than what Celestron recommends. This is another tactic employed make the telescope seem competitive with other similarly priced telescopes advertising similar claims. By Christmas of 1999 the claims had evolved so we found a 60mm telescope in a sporting goods store claiming 525X; where do they dig up the guys who write that stuff?
Shaky Mounts: often the mount and tripod contribute to the inadequacy of the system by being spindly and vibrating even on a mild breezy evening. Anyone touching the telescope to adjust its position, or to focus it onto an object will find the vibrations distracting at the least.
Eyepieces: furnished are usually of modest or poor quality. Often with such little eye relief (distance from the eyepiece lens to the observers eye) that using the telescope is at the least uncomfortable, and for those who must wear prescription glasses when observing – inadequate. This is aside from the concerns of passing disease (Bacterial or Viral Conjunctivitis for example) when sharing such eyepieces among a number of people. The poor eyepieces are often the result of consumers “I want a best buy” mentality which drives suppliers to provide two or more cheap eyepieces in place of one of good quality.
Unsafe Sun Filter: A number of imported small telescopes used to be furnished with a dark glass "Solar Filter" that threads on to the eyepiece. These are harmful, capable of leading to eye damage or possibly blindness and so they are generally not sold with new telescopes but may be included with older used equipment – so be on the lookout for them! Many early astronomers gradually went blind (including Galileo) because they looked at the sun over time with smoked glass neutral density filters which attenuated the brightness but failed to filter out the harmful portions of the sunlight spectrum. Smoked glass filters may crack and open to pass sunlight from heat build up if a suitable aperture stop is not in place. We suggest all telescope users be cautioned about the dangers of observing the sun without the use of proper safety equipment; small children may need constant adult supervision or restricted access to the telescope.
Above: CCD Images approximate (albeit in black and white and two dimensionally) what may be seen through a good telescope:
Not all beginners need to start with a telescope there are several alternatives to buying a telescope for those who are unsure of their degree of interest, or for those with modest financial means:
But for all there is to do naked eye or with binoculars, the person in situated in an urban or suburban setting may not be able to enough to see to retain their interest for long and sooner or later a telescope will be preferred.
Company Seven offers books that are very helpful to those who wish to build their own astronomical telescope, including Build Your Own Telescope: Hardback, by Richard Berry: is one the first books which Company Seven recommends to those persons who are considering the decision of whether or not to build an astronomical telescope, or who have decided to build a telescope. In clear, step–by–step instructions, author Richard Berry explains how to build five telescopes from a simple reflecting telescope, up to a telescope capable of sustaining a lifetime's interest in astronomy.
Detailed instructions include complete plans and photographs that show how to construct a capable telescope with ordinary household tools and materials. We also suggest this for use in guiding children who are doing such a task as a science fair project. It is written and illustrated so that anyone between a teenage novice to the adult amateur astronomer will find the book interesting, and helpful.
READ! You could browse the popular astronomy magazines including Sky and Telescope or Astronomy, this will help you to learn about coming events or objects to observe in the night sky. However, more and more you will find the latest astronomy news on the Internet, sometimes months before the news appears in print!
You can visit Users Groups on the Internet to read opinions of particular products. Keep in mind that one amateur's opinion may not be enough information to justify a large expenditure but if you hear good about a product from ten people then it is likely that you can trust it. And do not believe someone is credible simply because they frequents a user group.
Company Seven does offer books that are very much up to date and offer much sound advice about the selecting and use of astronomical telescopes. These titles include:
All four of these books offer a good introduction to astronomy, advice about selecting equipment, how to go about astronomy naked eye, or with equipment to observe a wide range of astronomical subjects. They are written in a fashion that is understandable to a youngster, and yet an adult will not find it to be as a "Dick and Jane" novel. Most of the numerous photographs are done by the types of amateur telescopes discussed (many by our customers) – not by Mount Palomar, so one can glean a good idea of what is truly possible with one man, portable telescopes. You can see these titles at our showroom or order these books and many other interesting titles from Company Seven if you wish to have it sent to you.
You may contact our showroom to obtain advice, or if at all practical visit our showroom in Laurel, Maryland near Washington, D.C. and Baltimore, MD. You will find directions to visit Company Seven on line at
Wishing you Clear Skies!
![]() 3. How Telescopes Work
3. How Telescopes Work
Light Gathering Power: to see very faint objects – making the invisible obvious, and
Bottom Center: Inverted and Reversed – typical of a Newtonian or other telescope with no accessory. (5,849 bytes)![]() 4. What Parts Make a Telescope?
4. What Parts Make a Telescope?
Click on image to see enlarged view
![]() 5. Earth's Motion and the Equatorial Mount
Stop the World, I Want To Observe! The relatively simple Mount Head that permits you to move the telescope smoothly left to right or up and down (Alt–Azimuth Mount, as shown above to the right) may be quite suitable for some casual astronomy, and terrestrial uses. This mount may also be suitable for a short exposure film or video photography of the Moon, or with a safe solar filter the Sun, or terrestrial objects and wildlife. But keep in mind the Earth rotates at a rate of about one revolution every 24 hours or so, and celestial objects seem to move across the sky in arcs as the Earth turns. On a clear night one can observe the Moon rising through the trees at only a magnification of 1X (naked eye). A view of the full Moon will require a telescope operate at a magnification of about 80X or possibly more depending on the eyepiece design. One has to move a manual Alt–Az mount very carefully up and to the right as the Moon rises from the East peaking in the Southern sky, and then continue moving the telescope down and right as the Moon sets in the West. So now speed up that motion of up and right with the Moon moving across the field of view of an eyepiece at a rate about 80 times faster than when you observed it with the naked eye...get the picture? Now try to follow a planet while observing at 200X or more!
5. Earth's Motion and the Equatorial Mount
Stop the World, I Want To Observe! The relatively simple Mount Head that permits you to move the telescope smoothly left to right or up and down (Alt–Azimuth Mount, as shown above to the right) may be quite suitable for some casual astronomy, and terrestrial uses. This mount may also be suitable for a short exposure film or video photography of the Moon, or with a safe solar filter the Sun, or terrestrial objects and wildlife. But keep in mind the Earth rotates at a rate of about one revolution every 24 hours or so, and celestial objects seem to move across the sky in arcs as the Earth turns. On a clear night one can observe the Moon rising through the trees at only a magnification of 1X (naked eye). A view of the full Moon will require a telescope operate at a magnification of about 80X or possibly more depending on the eyepiece design. One has to move a manual Alt–Az mount very carefully up and to the right as the Moon rises from the East peaking in the Southern sky, and then continue moving the telescope down and right as the Moon sets in the West. So now speed up that motion of up and right with the Moon moving across the field of view of an eyepiece at a rate about 80 times faster than when you observed it with the naked eye...get the picture? Now try to follow a planet while observing at 200X or more!
 The Earth rotates about its axis once full turn over a period of just under a day. This period of 23 hours 56 minutes 04.09053 seconds is called the sidereal period, or the period relative to position of the stars overhead. The sidereal period is not exactly equal to one 24 hour day because by the time the Earth has rotated once on its axis, it has also moved along the path of its orbit around the Sun, because of this the Earth has to keep rotating for about another 4 minutes before the Sun seems to be back in the same place in the sky that it was in exactly a day before. As the Earth rotates in space the celestial objects overhead appear to move in an arc across the sky.
This is a Quicktime presentation courtesy of NASA, and so your Web Browser must be enabled to allow popups and view .mov files (3.6 megabytes).
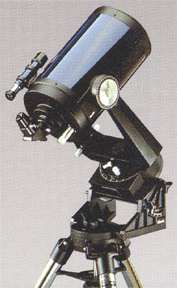
![]() 6. Fork Equatorial Mounts are so named because of their resemblance to the tines of a fork. The Fork Mount is basically a tilted Alt–Azimuth mount. This arrangement allows movement of the telescope optical tube assembly up and down, and left and right. If the fork mount is attached onto a level platform or a field tripod then the telescope can easily be used for terrestrial applications. For tracking in astronomical uses the Fork Mount is attached onto an Equatorial Wedge with Tilt Plate adjusted (raised or lowered) so that the R.A. rotational axis of the Fork can be aligned to be parallel to the rotational axis of Earth. In an equatorial arrangement the Fork Mount is an aid to teaching concepts in astronomy including the Coordinate System used for Celestial Navigation.
6. Fork Equatorial Mounts are so named because of their resemblance to the tines of a fork. The Fork Mount is basically a tilted Alt–Azimuth mount. This arrangement allows movement of the telescope optical tube assembly up and down, and left and right. If the fork mount is attached onto a level platform or a field tripod then the telescope can easily be used for terrestrial applications. For tracking in astronomical uses the Fork Mount is attached onto an Equatorial Wedge with Tilt Plate adjusted (raised or lowered) so that the R.A. rotational axis of the Fork can be aligned to be parallel to the rotational axis of Earth. In an equatorial arrangement the Fork Mount is an aid to teaching concepts in astronomy including the Coordinate System used for Celestial Navigation.
![]() 7. The German Equatorial Mount is selected for use with telescopes of relatively longer physical lengths, or for improved portability with some mid sized and larger telescopes, or to increase versatility. The German Equatorial Mount is the design preferred for the physically longer telescopes including the Newtonian Reflector and Refracting telescopes. Incidentally, Josef von Fraunhofer invented the mount, and in Germany the German Equatorial mount is called a “deutsche Montierung” (thanks Georg).
7. The German Equatorial Mount is selected for use with telescopes of relatively longer physical lengths, or for improved portability with some mid sized and larger telescopes, or to increase versatility. The German Equatorial Mount is the design preferred for the physically longer telescopes including the Newtonian Reflector and Refracting telescopes. Incidentally, Josef von Fraunhofer invented the mount, and in Germany the German Equatorial mount is called a “deutsche Montierung” (thanks Georg).
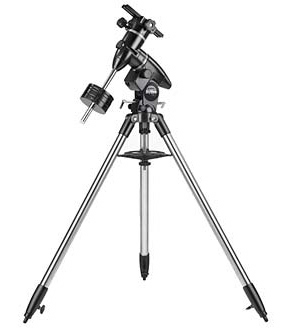 Right: Click image if you wish to take a 360 degree tour of the SkyView Pro™ 8 telescope which includes the German Equatorial mount shown at right.
This is a Macromedia Flash presentation, and so your Web Browser should be enabled to view it (163,690 bytes).
With an optional Clock Drive and either a Piggyback Camera Mount or a telescope with Camera Adapter the owner is equipped to pursue introductory astrophotography producing results that most amateurs would be proud to hang on their wall.
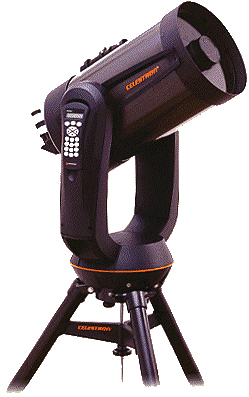
![]() 8. Computer Controlled Fork Mounts when introduced in 1985 by Celestron International as the “Compustar”, this telescope became the first consumer oriented computer–driven telescope sold. Telescopes have since evolved over the recent decades to offer a good degree of simplicity and user friendliness; Celestron and Meade Instruments remain in the forefront, while others including Orion telescopes have helped to increase choices of these products for the consumer.
8. Computer Controlled Fork Mounts when introduced in 1985 by Celestron International as the “Compustar”, this telescope became the first consumer oriented computer–driven telescope sold. Telescopes have since evolved over the recent decades to offer a good degree of simplicity and user friendliness; Celestron and Meade Instruments remain in the forefront, while others including Orion telescopes have helped to increase choices of these products for the consumer.
![]() 9. How To Weigh What Will be Most Important to You
9. How To Weigh What Will be Most Important to You
a. What objects can you realistically expect to see from where you will observe?
The fundamental determinants of the optical performance of any astronomical telescope are these three variables:
(Depending how you answer this may be followed by do you know a good divorce lawyer).
 Left: telescope optics selection matrix (9,638 bytes).
Telescope #1 is of Grade A quality (the best); it has a Grade A design, and it is of a relatively small Grade D aperture. Telescope #2 has a large Grade A aperture, with a Grade C or D in areas of Quality of excellence and Design. Depending on your priorities Telescope #1 may yet actually be a better choice Telescope #2.
will not have the characteristics necessary to keep one interested.
![]() 10. Refracting Telescopes
10. Refracting Telescopes
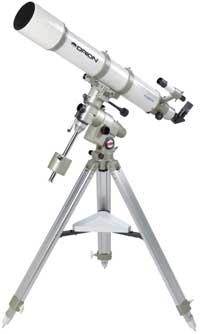 Left: Vixen 102FL 4 inch f9 Fluorite Apochromatic refractor telescope shown on optional Vixen GP German Equatorial Mount and Tripod. This is one of the first relatively affordable high performance 4 inch apochromats made available to the amateur. (13,789 bytes).
 Left: TeleVue 4 inch (10cm) telescope cross section: 1. air spaced doublet objective lens, 2. mounting collar, 3. telecompressor/field flattening doublet lens, 4. 2” focuser, 5. 2” mirror diagonal, 6. 2 to 1.25” reducer, 7. eyepiece (13,891 bytes)
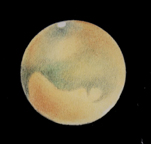 Left: Mars as observed by Robert Kochenour through Vixen 102FL 4 inch Apochromat with TeleVue 9 Nagler ocular and 2X Barlow (200X), 20 Sept. 1988 (3:45 U.T. 21 Sept.). Seeing conditions 7–8. Copy of pencil and pastel sketch. The late Mr. Kochenour was a customer, and friend of Company Seven (11,417 bytes).
![]() 11. Reflecting Telescopes are arranged as an open tube system which employs two reflecting mirrors to form the primary image. The reflecting design originated with an English mathematician although it was first constructed by Sir Isaac Newton (hence Newtonian. This system employs two mirrors; a parabolic Primary Mirror (its diameter, termed aperture, is the property by which most telescopes are described, hence an eight inch telescope has a primary mirror 8 inches or 20cm in diameter). The primary mirror of the telescope is precisely mounted in a Cell at the rear of the telescope. The light entering the telescope is gathered and then reflects forward in a converging beam, to the Secondary Mirror which is positioned near the front of the telescope. The light from the primary mirror is then reflected out to the side of the telescope achieving focus at a point beyond the focuser. An eyepiece for viewing, or if designed with adequate “back focus” a camera for photography is placed at the focuser.
11. Reflecting Telescopes are arranged as an open tube system which employs two reflecting mirrors to form the primary image. The reflecting design originated with an English mathematician although it was first constructed by Sir Isaac Newton (hence Newtonian. This system employs two mirrors; a parabolic Primary Mirror (its diameter, termed aperture, is the property by which most telescopes are described, hence an eight inch telescope has a primary mirror 8 inches or 20cm in diameter). The primary mirror of the telescope is precisely mounted in a Cell at the rear of the telescope. The light entering the telescope is gathered and then reflects forward in a converging beam, to the Secondary Mirror which is positioned near the front of the telescope. The light from the primary mirror is then reflected out to the side of the telescope achieving focus at a point beyond the focuser. An eyepiece for viewing, or if designed with adequate “back focus” a camera for photography is placed at the focuser.
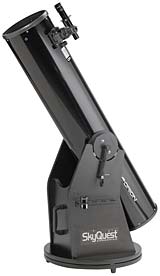 Left: Orion SkyQuest™ 8"(20cm) f6 Dobsonian telescope.
Notice how the physical length of this f6 telescope is about six times the diameter. (14,045 bytes).
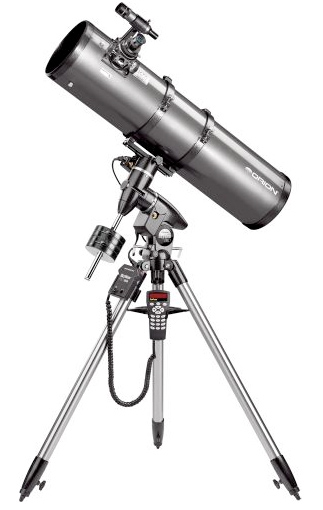 What about astrophotography? these are wonderful telescope for many uses however, the Dobson style telescopes are not equipped for astrophotography since these lack a mount that is suited to the task. Remember, it is the telescope optical tube assembly determines what may be seen and what may be photographed. But it is the mount (or carriage) of a telescope that determines how the telescope can be employed. Your telescope must have a tracking mount such as a German Equatorial Mount to enable the system to take good images of celestial objects; even an image of the the Moon will not be as sharp with a quick snapshot taken at a Dobsonian telescope focuser as it would if the telescope were tracking.
Click on image to see enlarged view.
![]() 12. Catadioptric Telescope designs include a number of variants most popularly either the "Schmidt Cassegrain", "Maksutov–Cassegrain" or "Maksutov–Newtonian" designs. The primary characterization is that these telescopes incorporate a perforated primary mirror permitting the focal plane to reach the rear of the telescope and employ a refractive components. These tend to be closed, relatively low maintenance systems.
12. Catadioptric Telescope designs include a number of variants most popularly either the "Schmidt Cassegrain", "Maksutov–Cassegrain" or "Maksutov–Newtonian" designs. The primary characterization is that these telescopes incorporate a perforated primary mirror permitting the focal plane to reach the rear of the telescope and employ a refractive components. These tend to be closed, relatively low maintenance systems.
 Left: Schmidt–Cassegrain telescope optical arrangement; 1. Aspheric Corrector Lens,
2. Primary Mirror, 3. Secondary Mirror (curved out or "convex", and aspheric) and Baffle,
4. Primary Light Baffle Tube and support for Primary Mirror, 5. Rear Cell (accessory holder)
6. Prism or Mirror Diagonal, 7. Eyepiece, 8. Focus Control Dial (20,116 bytes)
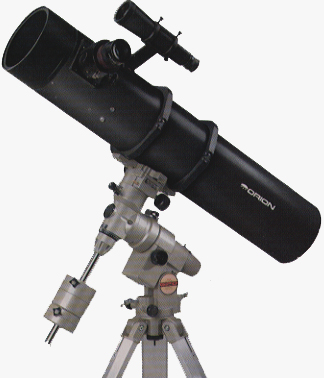
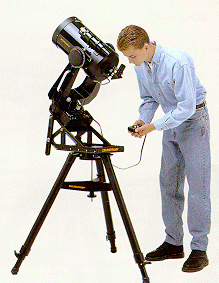 Left: Celestron Ultima 8 PEC a "C–8" Schmidt Cassegrain telescope optical tube assembly with Fork Mount on Equatorial Wedge and Field Tripod (112,601 bytes).
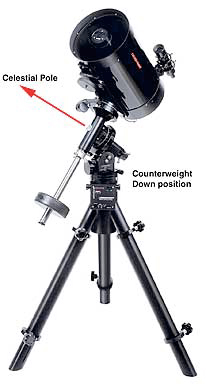 Right: Celestron C–11 Schmidt Cassegrain Telescope optical tube assembly on Losmandy Model G–11 German Equatorial Mount with Field Tripod (31,829 bytes). Note red arrow indicating Pole Axis orientation to Celestial North (or South) Pole for proper "Pole Alignment" of the mount
![]() 13. Accessories: The Eyepiece There are now more good to excellent quality telescopes available to the consumer than ever before. With advances in technology, manufacturing, and with fierce competition the consumer has never before been able to obtain such good telescopes, and at a cost of a smaller portion of an average person's annual income. In order to tailor a telescope to do what one wishes to do it requires some accessories be added to the telescope. Most commonly this includes eyepieces (ocular) used to vary the magnification and field of view observed, filters, and more.
13. Accessories: The Eyepiece There are now more good to excellent quality telescopes available to the consumer than ever before. With advances in technology, manufacturing, and with fierce competition the consumer has never before been able to obtain such good telescopes, and at a cost of a smaller portion of an average person's annual income. In order to tailor a telescope to do what one wishes to do it requires some accessories be added to the telescope. Most commonly this includes eyepieces (ocular) used to vary the magnification and field of view observed, filters, and more.
Since the eyepiece helps to determines magnification an astronomical telescope will sooner or later be accessorized to include at least a few of these accessories. The first choice will be of a low magnification eyepieces for finding and observing the larger deep sky objects, then another (at about 80X) for a close up the Moon or Sun and deep sky objects, and a third to enable recognizing changing features on the planets (ideally about 200X or more).
![]() 14. Where and How Telescopes are Sold Telescopes are most often sold at retail department stores, science or nature oriented chain stores, by mail order, and at the very few remaining service oriented specialty shops (who also ship to the customer) including Company Seven. During the last visit of Comet Halley, New York mail order camera stores entered the telescope market and this too has squeezed the traditional telescope retailers further. With the advent of the Internet the and on line auction sites a number of small, often unlicensed amateur (semi professional) persons with no traditional overhead expenses have also entered the fray. But then the Internet makes it more possible for more people who are persistent to find the better retailers, and possibly gain some warning to avoid others.
14. Where and How Telescopes are Sold Telescopes are most often sold at retail department stores, science or nature oriented chain stores, by mail order, and at the very few remaining service oriented specialty shops (who also ship to the customer) including Company Seven. During the last visit of Comet Halley, New York mail order camera stores entered the telescope market and this too has squeezed the traditional telescope retailers further. With the advent of the Internet the and on line auction sites a number of small, often unlicensed amateur (semi professional) persons with no traditional overhead expenses have also entered the fray. But then the Internet makes it more possible for more people who are persistent to find the better retailers, and possibly gain some warning to avoid others.
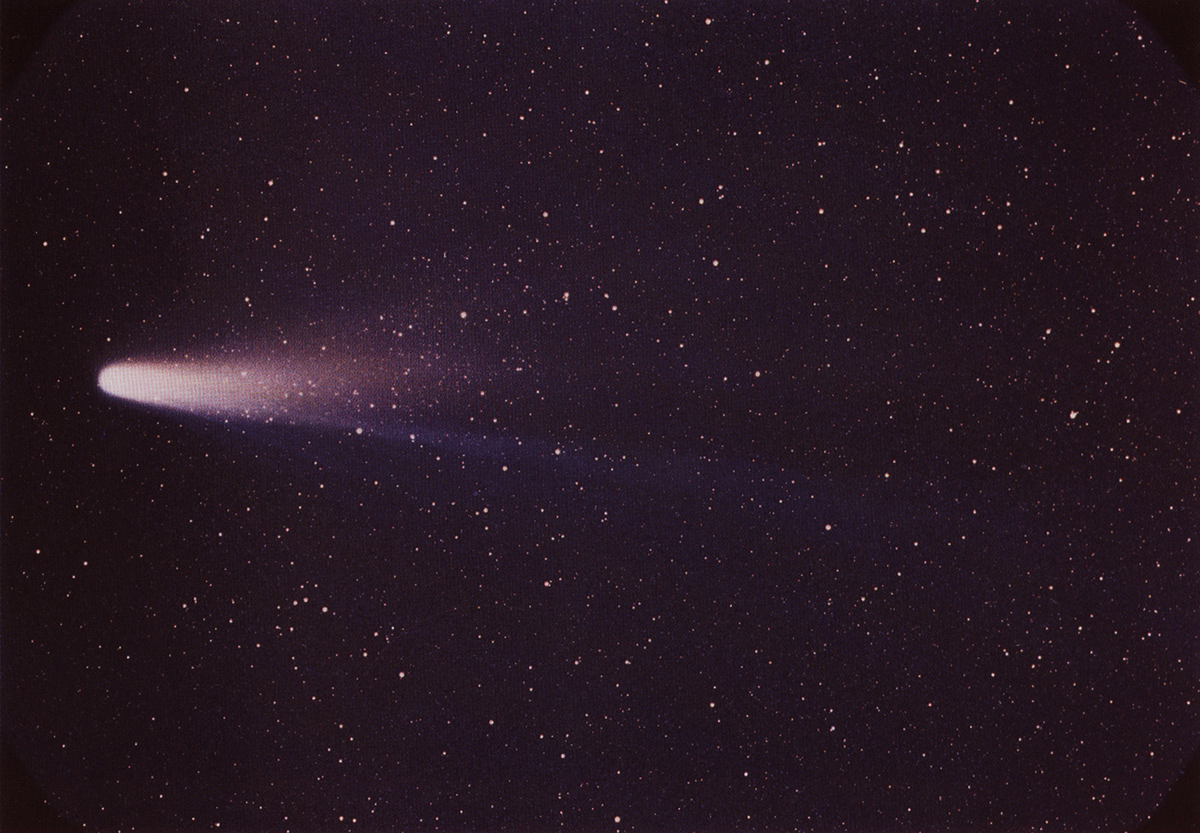 Special events: when sales may be motivated by an attraction in the news then some merchandisers tend to build up false hopes with promises of spectacular visions and the like. They may hustle telescopes ill suited to the task, consider the “Halleyscopes” of the mid 1980's where the comet actually appear worse than when viewed through a binocular or by the naked eye. As production increases to meet the sudden demands of special events, the quality controls of many consumer oriented products tends to suffer.
NASA International Halley Watch Large Scale Phenomena Network. A 16 x 20 inch print is displayed at Company Seven's showroom. NASA Image Catalog No. LSPN–1725.
Click on image to see enlarged view (1,034,677 bytes).
![]() 15. How To Get Started and Avoid Failure In order to be a "successful choice" an astronomical telescope must be able to:
15. How To Get Started and Avoid Failure In order to be a "successful choice" an astronomical telescope must be able to:
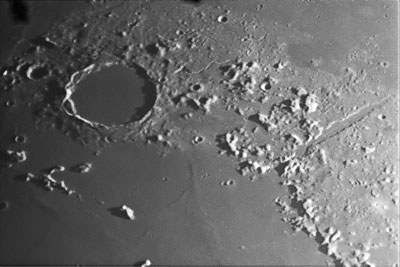

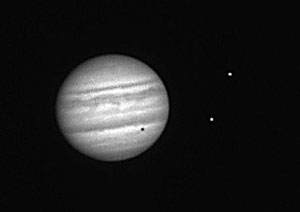
Moon crater Plato, Saturn, and Jupiter (note the moons with shadow of one moon transiting the planet).
Images through Astro–Physics 10 inch Mak telescope by Roland Christen.
 A planisphere can be the best first investment for those who are not familiar with their night sky. Refer to our David H. Levy Guide to the Stars Planisphere to learn more about what there is to find and how to do it. And to make reading the planisphere possible at night without affecting your night vision we also recommend the Rigel Skylite. This is a really handy user selectable red or white flashlight that makes it easier to set up and use the telescope or read charts at night under the red light without adversely affecting your night vision. The light may be dimmed as needed, and it's highly efficient Light Emitting Diode sources (3,000+ hours on one battery!) produce a nicely uniform beam of light, without brighter and darker areas typical of incandescent bulbs. If you need, you can also switch over to a very bluish white light for routine uses.
![]()
Contents Copyright 1994-2010 Company Seven All Rights Reserved